Hotpoint Microwave Parts

Hotpoint Appliance Parts

Popular Hotpoint Microwave Parts

Your Price
$11.02
   In Stock
Hotpoint Microwave Light Bulb - 40W
★★★★★
★★★★★
7 Reviews
PartSelect Number PS217532
Manufacturer Part Number 40A15
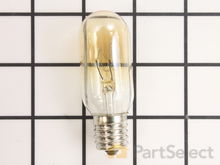
This 40-Watt light bulb is sold individually and is a genuine OEM replacement option for your home appliances. It is specially designed to withstand extreme temperatures, so this bulb is compatible with a variety of appliance types including refrigerators, ranges, microwaves, and dryers. It features a frosted glass bulb with a standard metal socket base, which allows you to easily unscrew the burnt-out light and twist the new bulb into place. Depending on your appliance, there may be a guard or cover protecting the lightbulb, in which case you may require additional tools to remove the cover. We recommend disconnecting the power supply to your appliance before changing the lightbulb.
Installation Instructions
J. Douglas from Grass Valley, CA
Broken plastic parts
Cleaned the refrigerator as the old parts were removed. Installed new parts as the old parts were removed so as to easily identify the replacement parts. Very easy and wife was extremely happy after old plastic parts self destructed over a period of months and refrigerator was essentially unusable on the bottom two drawers. Read more...
Your Price
$22.15
   In Stock
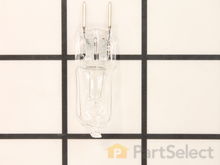
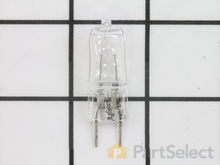
Hotpoint Microwave Halogen Light Bulb - 120V 20W
★★★★★
★★★★★
41 Reviews
PartSelect Number PS2351821
Manufacturer Part Number WB25X10019
This light bulb is located on the inside of your microwave. The bulb is behind the top grill. It will need to be replaced when it has burnt out and no longer works. Unplug the unit before beginning this repair. Remove the top grill of your microwave, use your screwdriver to open the light socket, scrape off any silicone holding the bulb in place, clean the area of any oil and dirt, insert the new bulb into the socket without touching the bulb, slide the holder back into place, line up the tabs on top of the metal plate, and secure the holder back into place.
Installation Instructions
Mark from GRAND BLANC, MI
Lens cracked and bulbs burned out
First I removed the single screw holding the lens assembly in place. Then I lowered the assembly and tilted it until it came out. To remove the existing cracked glass lens there were four tabs bent down on it. By hand I lifted each tab just enough to remove the broken lens. I then replaced the broken lens with the new one and re-bent the tabs down by hand to secure them to the new lens.

The lens assembly, now removed, revealed the cavity that contained the two halogen bulbs. Since they were both burned out for days, they weren't hot so I could pull each one out by hand. The bulbs are secured by two straight heavy gauge wire leads and provided a little resistance but come out fairly easily. Make a mental note of the angle they came out so it will be easier to replace them with new ones.

You're not supposed to touch halogen bulbs with your bare hands, so I used the bubble wrap they came in as a means to hold the bulb while installing it.

Be sure to insert the bulbs at the same angle they came out so the pins do not get bent.

Once both bulbs are in place, replace the lens cover assembly by putting the end opposite where the screw hole goes in first on the right, then swing it up until flush and screw it down.
Read more...
Your Price
$10.58
   In Stock
Hotpoint Microwave FUSE
★★★★★
★★★★★
19 Reviews
PartSelect Number PS1481237
Manufacturer Part Number WB27X10928
This ceramic microwave fuse is just over an inch in length. It is white in the center, and metal on both ends. This is a 20-amp fuse, and is used to power your microwave. If the touch pad on the microwave becomes unresponsive, the microwave produces little to no heat, or the appliance simply does not turn on, it could mean that your fuse is at fault and needs to be replaced. Because this part contains an electrical charge, remember to disconnect power to the microwave unit before you begin this repair. NOTE: Before you start this repair, ensure that the microwave is unplugged, and the capacitor is discharged. A capacitor stores large amounts of electricity even after your microwave is unplugged.
Fixes these symptoms
  • No heat
  • Touchpad does not respond
  • Won’t turn on
  • See more...
Installation Instructions
Kim from Cliffside Park, NJ
Microwave completely stopped working
Turned out the issue was easily solved by replacing a single, inexpensive fuse.

First off, UNPLUG THE MICROWAVE.

The fuse is located under the plastic grill at the top of the microwave. It's held on by two screws. Once you've removed the screws and taken off the plastic grill, you go to the right side of the microwave and remove another screw that holds a small metal grill in place. Removing the small metal grill is probably the toughest part of this repair. You kind of have to rock it back and forth a bit to get it to release. Once that's off, you can get to the fuse. I removed the burnt out one with a pair of needle nose pliers. I also put a small piece of cardboard under the fuse when I did this so I didn't accidentally drop it into the innards of the microwave. I did the same thing when I replaced the new fuse. I then plugged the appliance back in and made sure it worked. Once that was confirmed, I replaced both grills.
Read more...
Your Price
$21.66
   In Stock
Hotpoint Microwave Halogen Lamp - 50W
★★★★★
★★★★★
15 Reviews
PartSelect Number PS2339783
Manufacturer Part Number WB08X10057
Lamp also known as light bulb. Sold individually.
Fixes these symptoms
Installation Instructions
Sharry from Lititz, PA
Microwave bulb was burnt out
It is easy to repair the burnt out bulb if one has the correct bulb. Your website is very user friendly and your service is great. I was not able to replace the bulb at this time because our RV is at the repair shop for some other matters. I am sure the installation of the new bulb will go smoothly. Thanks for asking. Sharry Kiehl Read more...
Your Price
$37.74
   In Stock
Hotpoint Microwave Light Bulb - 40W
★★★★★
★★★★★
23 Reviews
PartSelect Number PS8767095
Manufacturer Part Number WB25X10030
This is a genuine replacement 40 watt bulb for a microwave. The bulb is meant to light up the underside of the microwave or inside of your microwave when the door is open or during use. If your bulb is not illuminating, you may need to replace it. If the bulb is shattered, be sure to use protective gloves during replacement. Always unplug your microwave before completing any repairs. We suggest ordering a spare, as this is a common wear part.
Installation Instructions
Margaret from TOANO, VA
bulb burned out under the microwave that lights the cooktop underneath
got a screwdriver and opened the glass door over the light bulb - changed the bulb and put the glass door back with the screwdriver. Read more...
Your Price
$8.54
   In Stock
Hotpoint Microwave EXHAUST ADAPTER
★★★★★
★★★★★
2 Reviews
PartSelect Number PS12709817
Manufacturer Part Number WB02X32715
This is the replacement damper bracket for your microwave. It is made of plastic and is approximately 11 inches wide and 3 inches long. The damper bracket attaches to the outer cabinet and directs airflow through the vent duct. The main reason you would replace the damper bracket is if it is damaged and will not hold the damper in place properly. This part is sold individually and is a genuine OEM part sourced directly from the manufacturer.
Installation Instructions
Georgia from West Chester, OH
I needed a bracket to install my microwave
I wasn't sure which parts I needed.We searched several web sites until we found yours.I was real pleased with the service. My parts where delivered in a timely manner. Everything I needed to install my microwave was in my order. Thank you for the service.
Georgia westchester ohio
Read more...
Your Price
$22.00
   In Stock
Hotpoint Microwave Light Bulb - 40W 130V
★★★★★
★★★★★
24 Reviews
PartSelect Number PS247209
Manufacturer Part Number WB36X10003
This light bulb is a 40 watt, 130-volt clear appliance light bulb that is manufactured to fit microwaves with small-base light bulb sockets. The light bulb illuminates the inside of the microwave while the microwave is running. You may need to replace this part if the existing one is burnt-out or broken. If the existing light bulb is broken, disconnect power to the microwave and remove the bulb base with a pair of needle nose pliers. This is a common wear item, so it is recommended to order a spare. These light bulbs are sold individually.
Installation Instructions
Gene from Urbana, IL
Light bulb out, tried to remove, lamp socket broke
Above the stove mounted microwave. I dropped the lens cover from under the bulb and tried to remove the bulb. The bulb separated from the base. I tried to remove the base with a pliers and the lamp socket broke. I ordered the parts and dropped the bottom cover of the unit down (5 screws). Removed 1 screww from the lamp socket, unplugged the wires and took it out. Simply replaced socket, fastened bottom cover of microwave, installed new bulb and closed lens cover. Read more...
Your Price
$45.34
   In Stock
Hotpoint Microwave Secondary Door Switch
★★★★★
★★★★★
45 Reviews
PartSelect Number PS237421
Manufacturer Part Number WB24X829
The secondary door switch is a simple on/off mechanism that stops the microwave from operating when the door is open (normally opened). The switch monitors the door latch position, and communicates whether the door is open or closed to the electrical control board. This door switch is approximately 1 inch long, and has 2 metal prongs called terminals that extend out of its body. Common symptoms related to a faulty secondary door switch include: microwave will not turn/shut off, or the microwave will not heat properly. NOTE: Before you begin this repair, first make sure your microwave is unplugged, and that your capacitor is discharged. A capacitor stores large amounts of electricity even when your microwave is unplugged.
Fixes these symptoms
  • Doesn’t shut off
  • No heat
  • Touchpad does not respond
  • See more...
Installation Instructions
Marla from Arlington, TX
light worked, timer and control pad worked, but no turntable, no heat, no noises of any sort, just didn't start up
Noted on partselect.com that someone else with this problem, found it to be secondary door switch. There are three door switches in this model, but online info noted that one of the three might feel "soft" (in my case, one switch clicked in a rather "jiggly" way, the other two were strong decisive clicks.) To access the door switches on this model was the only difficult part. First use a torx bit to remove the two torx screws below the latches inside the microwave. This frees the latching part inside, that holds the door switches, which you will remove after you take off the control panel. The top grill has to come off before you can remove the door panel. Remove the screws above the grill, on the microwave top cover, The grill on this model is covered with a panel that moves out when it vents. After removing the two top screws, the covered grill vent slides left to remove. Be careful, as the sliding tabs are plastic. Wiggle and jiggle it, to slip it off. Below the removed grill, is a small metal grill with one screw in lower center. Remove that screw, and wiggle that out. You'll then see the one screw that holds on the control panel. Remove this screw, and lift the control panel up to remove. Again, go slowly and gently, as the bottom tabs holding the control panel in, are also plastic and easily broken. Lay the control panel on something, (I used the coffee maker) and pull out the wire bundles tucked on the left, that are attached to the latching panel. Wiggle the latching panel gently to lift it up off of it's plastic tabs and pull it out towards you, so you can see the three door switches. Each switch (part number WB24X829) has a little black switch on it. Feel each switch with either your finger, or a screwdriver to see which one doesn't "click" strongly. The weak one is the one you will replace. The door switches are fitted into a tab, and plugged into their wires. Remove the defective switch, pull out the wires, and replace it with the new switch, plugging back the wires, and slipping it back into it's plastic tabs. Then put everything back together in reverse order. The entire job took me fifteen minutes EXCEPT for figuring out how to slide off the upper grill, which I have told you. A repairman would have cost $150, the part was $18. AND, there's a good chance, the other two switches will get "used up" in the next year or so as well, so I'll be ready next time. Thank you, Partselect, why work all day, to make money, only to give it to somebody else, for fifteen minutes of work. All I needed was the knowledge. Read more...
Your Price
$22.91
   In Stock
Hotpoint Microwave Charcoal Filter
★★★★★
★★★★★
17 Reviews
PartSelect Number PS8746150
Manufacturer Part Number WB02X11550
This is the replacement charcoal filter for your microwave. It is silver and black in color and measures approximately 10 inches by 2 ½ inches. The charcoal filter removes cooking odors from the air that circulates through the microwave vent. You will likely need to replace the charcoal filter if you notice any damage to it, or if it has been in your microwave for a long time. This part is sold individually and is an authentic OEM part sourced directly from the manufacturer.
Installation Instructions
Jared from SIERRA VISTA, AZ
Had to replace charcoal filter
Open the front cover by pushing it at the top (where it says “Push”), lifting up and pushing back on top edge of the old filter. Pull it out. Installing the new one is basically just the reverse of those steps! That simple.

Old filter did seem to be a little thicker (filter material), but the new one was the exact same dimensions, so it went in properly. Wish the filter material was white, so you knew just how dirty it was actually getting. But... :-D
Read more...
Your Price
$17.46
   In Stock
Hotpoint Microwave Glass Light Lens
★★★★★
★★★★★
23 Reviews
PartSelect Number PS247275
Manufacturer Part Number WB36X10071
The microwave glass light lens protects the light bulb inside the appliance. It is clear in color and measures approximately 6-1/2 inches long, and 2-1/2 inches wide. You may notice that this part is cracked or broken and will need to be replaced. You will need to remove the screw holding the cover in place. Unhook the cover from the bottom panel. Bend the tabs up that are securing the old lens in place. The textured side should be facing up. Place the new lens into place and secure back into place.
Installation Instructions
Mark from GRAND BLANC, MI
Lens cracked and bulbs burned out
First I removed the single screw holding the lens assembly in place. Then I lowered the assembly and tilted it until it came out. To remove the existing cracked glass lens there were four tabs bent down on it. By hand I lifted each tab just enough to remove the broken lens. I then replaced the broken lens with the new one and re-bent the tabs down by hand to secure them to the new lens.

The lens assembly, now removed, revealed the cavity that contained the two halogen bulbs. Since they were both burned out for days, they weren't hot so I could pull each one out by hand. The bulbs are secured by two straight heavy gauge wire leads and provided a little resistance but come out fairly easily. Make a mental note of the angle they came out so it will be easier to replace them with new ones.

You're not supposed to touch halogen bulbs with your bare hands, so I used the bubble wrap they came in as a means to hold the bulb while installing it.

Be sure to insert the bulbs at the same angle they came out so the pins do not get bent.

Once both bulbs are in place, replace the lens cover assembly by putting the end opposite where the screw hole goes in first on the right, then swing it up until flush and screw it down.
Read more...

Hotpoint Microwave Appliance Types

Related Hotpoint Microwave Parts

Popular Hotpoint Microwave Models

Below are the most popular Hotpoint Microwave models we have. Enter your model number in the search box to find your model.