Hotpoint Oven Parts

Hotpoint Appliance Parts

Popular Hotpoint Oven Parts

Your Price
$66.52
   On Order
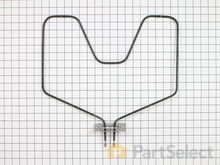
Hotpoint Oven Bake Element - 220V 2300W
★★★★★
★★★★★
90 Reviews
PartSelect Number PS249466
Manufacturer Part Number WB44X5082
This bake element goes in the bottom of your range and is 220 volts and 2300 watts. This closed hinged style element with screw-in terminals measures at 15-1/4 inches long and 18-1/4 inches wide. The bottom bake element provides heat for baking. Tools you will need for this repair include pliers, screwdrivers, and an adjustable wrench. Before you begin this installation, remember to shut off the house circuit breaker or unplug your range. For safety purposes we also recommend wearing work gloves.
Fixes these symptoms
  • Element will not heat
  • Little to no heat when baking
  • Little to no heat when broiling
  • See more...
Installation Instructions
Wilbur from Taylorville, IL
element quit working
Unhooked electrical wiring from unit and rehooked new unit to electrical wiring. Read more...
Your Price
$45.72
   In Stock
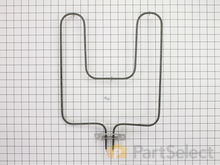
Hotpoint Oven Bake Element - 240V
★★★★★
★★★★★
113 Reviews
PartSelect Number PS249424
Manufacturer Part Number WB44X200
This is a 240 volt bake element for your oven or range. The kit comes with two installation screws and the element. The element functions by supplying heat from the bottom of the oven to bake or cook your food. You may need to replace the bake element if your oven is not heating properly. This is a black metal part (Width 13 inches, length 16.5 inches, depth 1-1/2 inches ) which can be installed onto your range with a screwdriver. Installation is rated as "medium" difficulty. This element is the part that heats to allow cooking, and if broken or missing you'll be unable to cook. This part attaches to the lower section of the range. Refer to your model number and user manual to ensure this part is right for you. Each screw gets screwed into each wire terminal with a Phillips screw driver. Hold the wires forward to make sure the wires do not fall back through the rear of the oven. Unplug your appliance or shut off your circuit breaker to the appliance before installing the new part.
Fixes these symptoms
  • Element will not heat
  • Little to no heat when baking
  • Little to no heat when broiling
  • See more...
Installation Instructions
Beth from Matthews, NC
Replacment of the bake unit
The hardest part was removing the old nuthead screws off the old bake burner. Once those were off installing the new bake element was simple. One screw in each wire terminal, two hex head screws to hold the unit in place. Works like a charm! Read more...
Your Price
$11.02
   In Stock
Hotpoint Oven Light Bulb - 40W
★★★★★
★★★★★
7 Reviews
PartSelect Number PS217532
Manufacturer Part Number 40A15
This 40-Watt light bulb is sold individually and is a genuine OEM replacement option for your home appliances. It is specially designed to withstand extreme temperatures, so this bulb is compatible with a variety of appliance types including refrigerators, ranges, microwaves, and dryers. It features a frosted glass bulb with a standard metal socket base, which allows you to easily unscrew the burnt-out light and twist the new bulb into place. Depending on your appliance, there may be a guard or cover protecting the lightbulb, in which case you may require additional tools to remove the cover. We recommend disconnecting the power supply to your appliance before changing the lightbulb.
Installation Instructions
J. Douglas from Grass Valley, CA
Broken plastic parts
Cleaned the refrigerator as the old parts were removed. Installed new parts as the old parts were removed so as to easily identify the replacement parts. Very easy and wife was extremely happy after old plastic parts self destructed over a period of months and refrigerator was essentially unusable on the bottom two drawers. Read more...
Your Price
$31.03
   In Stock
Hotpoint Oven Broil Element
★★★★★
★★★★★
24 Reviews
PartSelect Number PS249411
Manufacturer Part Number WB44X173
The broil element is located at the top of the oven and gives off heat in order to bake evenly. If you notice that the element is not heating up or is not cooking evenly it could be because it is broken or burnt out. The depth of the screw-on terminals is 2-3/4 inches and they are 1-1/4 inches apart. Does not include mounting bracket. All you need for this simple repair is small screwdriver. To complete this repair, you will need to first turn the oven off (or shut off the house circuit breaker), remove the two screws that are holding the old element in place, remove the two wires from the old part, and then connect them to the new part and screw back into place.
Fixes these symptoms
  • Element will not heat
  • Little to no heat when baking
  • Little to no heat when broiling
  • See more...
Installation Instructions
Harry from Rancho Santa Margarita, CA
Needed to replace cracked bake & broil element
This repair is very simple and only required about 15-20 minutes per unit. After turning off the power to your oven at the main breaker box, it's just a matter of removing two 1/4" screws and pulling out the units. The tricky part is removing the power plugs to the elements and not letting them slip back into the insulation. Once you plug in the new elements and screw them back in you are good to go. Once note, while you have everything out, it is a great opportunity to give your oven a good cleaning. Read more...
Your Price
$117.20
   In Stock
Hotpoint Oven Round Style Igniter
★★★★★
★★★★★
59 Reviews
PartSelect Number PS243425
Manufacturer Part Number WB2X9154
The round style oven igniter is also known as an oven bake or broil igniter and is compatible with your range appliance. The function of the round style oven igniter is to pull electrical current through the oven safety valve to open it. If your igniter is glowing for more than ninety seconds but it has not ignited the gas flame, that means that the igniter is not powerful enough to open the valve. Be very careful when handling this igniter as it is very fragile. This igniter has a range of 2.5 to 3.0 amps. Note that this round igniter will not replace flat style igniters.
Fixes these symptoms
  • Element will not heat
  • Gas igniter glows, but will not light
  • Little to no heat when baking
  • See more...
Installation Instructions
Mark from Upland, CA
No ignition
Unplug the oven.
Open the oven door.
Remove the racks.
Remove the two screws that hold the oven floor; they are located toward the back.
Remove the oven floor pan.
Remove the screw holding the heat shield/dispenser.
Remove the heat shield/dispenser.
Untwist the ceramic wire caps on the two igniter wires.
Remove the two screws holding the igniter.
Remove the igniter.
Replace the igniter working all the steps backwards.
It’s super simple.
Read more...
Your Price
$71.47
   In Stock
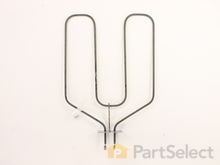
Hotpoint Oven Bake Element
★★★★★
★★★★★
36 Reviews
PartSelect Number PS249249
Manufacturer Part Number WB44K5013
This bake element is used in ranges and located at the bottom of the oven. The bake element supplies heat for baking. If your symptoms include: your oven is not heating evenly, not starting, or the heating is not consistent, then replacing the element can be the solution. Remove two retaining screws, make sure to disconnect the two connecters at each end of the element, and replace with the new one. Before starting this replacement, make sure the range is unplugged from the power source or shut off from the house circuit breaker. The tool needed is a Phillips screwdriver.
Fixes these symptoms
  • Element will not heat
  • Little to no heat when baking
  • Oven is too hot
  • See more...
Installation Instructions
Carl from Wynnewood, PA
bake element shorted out, sparking like a sparkler
first, made sure circuit breaker was off
second, used nut driver to remove 2 screws on old element, pulled it from the back of the oven
third, removed 2 wires from old element (spade connectors)
fourth, connected new element and pushed back into oven.
fifth, reinstalled 2 screws securing new element

this was all done by my 15 yr old son under my supervision.
Read more...
Your Price
$56.73
   In Stock
Hotpoint Oven Meat Probe Thermistor
★★★★★
★★★★★
4 Reviews
PartSelect Number PS1481046
Manufacturer Part Number WB20T10024
This probe is used to check the internal temperature of the meat to ensure proper temperature is reached. Also known as a Meat Probe.
Fixes these symptoms
Installation Instructions
Eric from SOUTHBURY, CT
Temp probe was defective
Threw the old one out - plugged the new one in. Steak came out just as ordered - medium rare. Read more...
Your Price
$81.33
   In Stock
Hotpoint Oven Broil Element - 240V
★★★★★
★★★★★
20 Reviews
PartSelect Number PS249244
Manufacturer Part Number WB44K5009
This OEM-sourced broil element with push-on terminals is located on the roof of your oven cavity, providing heat from above to cook and heat your food. It requires a 240-volt power supply to function properly. The element measures 13 1/4 inches in width and has a length of 15 7/8 inches from the mounting bracket to the back. If you are experiencing issues like uneven broiling or lack of heat, it is likely that the broil element is faulty and needs replacement. Before starting the replacement process, ensure that you turn off the oven at the breaker panel and let it cool down. To carry out the repair, you will need a flathead screwdriver, nut driver, and pliers. Begin by removing the oven door and racks. Then, unscrew the mounting screws that hold the old element in place and disconnect its wiring. Carefully pull out the old element from the appliance. When installing the new element, slide the wire contacts onto the terminals, insert it into the designated slot, and secure it with its fasteners. The top of the element is held in place by fork-like support clips, which are sold separately from the element itself.
Fixes these symptoms
  • Element will not heat
  • Little to no heat when baking
  • Little to no heat when broiling
  • See more...
Installation Instructions
Dianne from Rockville, MD
The broiler element caught fire and burned out while I was broiling a steak.
First I removed the two screws that hold the element in place. I then pulled the element out about 3 inches, but I had not turned off the power.
So, I shorted out one of the wires. Then I turned off the power but was afraid to go any farther.
An appliance repairman was at my house that day fixing my dryer seal. He was able to pull the wires through the insulation successfully and install the broiler element. He did not charge me any extra for this little extra job. But I learned my lesson. Cut the power before you begin! He told me that I could have wound up with a much bigger repair if the short had been in the wire that is connected to the control panel of the oven. I was very lucky!
Read more...
Your Price
$8.54
   In Stock
Hotpoint Oven RECEPTACLE PUSH-IN
★★★★★
★★★★★
7 Reviews
PartSelect Number PS752188
Manufacturer Part Number WB08T10026
This part is the replacement light socket for your oven. The oven light socket provides power to the light, and at the same time holds the light bulb in place.
Installation Instructions
Richard from Menifee, CA
No problems encountered.
Used nutdriver to remove screws holding cover over oven light socket, unclipped electrical connectors, removed socket by hand, then reversed the foregoing. Easy. Read more...
Your Price
$16.68
   In Stock
Hotpoint Oven Single Heating Element Support Clip
★★★★★
★★★★★
7 Reviews
PartSelect Number PS243701
Manufacturer Part Number WB2X9719
The metallic clip, or also known as a broil element support, is for a oven element on a range. This part holds the broil element in place on top of the oven. If your support clip is broken then this replacement should be the solution. The tools needed for this project are slip joint pliers. For safety precautions, make sure to unplug your range from the power source, or shut off the house circuit breaker before starting this project. Refer to the installation instructions for best results and accuracy.
Fixes these symptoms
Installation Instructions
Paul from Canton, NY
broiling element had burned through, req. its replacement
First I removed the two screws that hold the element in place. I also removed a screw that held one end of a support bracket. I then pulled the element out about 3 inches and disconnected the two wires. Reversing these steps, I finished the element's replacement.

I had noticed that the former element was sagging at the front end. I installed the additional clips (not original) on each forward end of the element for additional support.
Read more...

Hotpoint Oven Appliance Types

Popular Hotpoint Oven Models

Below are the most popular Hotpoint Oven models we have. Enter your model number in the search box to find your model.