Litton Parts

Litton Appliance Parts

Popular Litton Parts

Your Price
$11.73
   In Stock
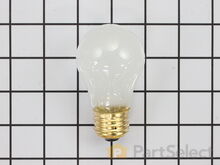
Litton Light Bulb - 40W
★★★★★
★★★★★
66 Reviews
PartSelect Number PS884734
Manufacturer Part Number 8009
This an authentic OEM 40-Watt replacement light bulb, used in a number of household appliances. It is specially designed to withstand extreme temperatures, which is why these replacement bulbs are most often used to light the inside of refrigerators and ranges. It features a standard socket base, which means you simply unscrew the burnt-out bulb and screw in the replacement. Depending on the appliance you may require a screwdriver or nut driver to access the light bulb. We recommend you wear work gloves while handling this replacement part. It is constructed of glass and metal and is sold individually. Depending on the appliance and location of the bulb within it, you may want to consider disconnecting power and using a flashlight for easier access to unscrewing and re-screwing in your bulb during this repair.
Installation Instructions
judie from mays landing, NJ
interior drawers were off their rollers
pulled the washer out and replaces the top roller system on both sides and the replaced the weels and brackets on the bottom drwaer. however i had trouble putting the dish washer back correctly and had to call a repairman to adjust the dishwasher and alighn it to open and close properly. but i did do good inside. i feel it was easy and a success. thank you for having the supplies for us to attempt to repair it on our own. Read more...
Your Price
$7.67
   In Stock
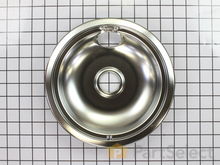
Litton Chrome Drip Bowl - 8 inch
★★★★★
★★★★★
42 Reviews
PartSelect Number PS11750107
Manufacturer Part Number WPW10196405
This manufacturer-certified drip bowl is also known as a drip pan, and it is designed for use with cooktops and ranges. It sits below 8-inch burner elements and catches drips and spills from the cookware on the burner. The diameter of the drip bowl is approximately 10 inches. This replacement might appear slightly different, but it will fit your appliance. You will need no tools to complete this repair. Simply remove the burner element, remove the old bowl, line up the hole on the new bowl with the terminal block and drop it into place. Make sure the bowl is flat before reinstalling the element. While you have the element out you should inspect the terminals for corrosion, damage, or discolouration. If you notice any of those things you should also replace the element and terminal block. You will need to replace your drip bowl if it is lost, damaged, or can no longer be cleaned. This replacement part is sold individually. To extend the life of your new drip bowl we recommend you clean it regularly with soap and water. We recommend only using the recommended drip bowl for your appliance; generic versions will not fit properly which could affect the performance of your elements and cause long-term damage.
Fixes these symptoms
Installation Instructions
Joe from Greeley, CO
oven wouldn't heat
First I removed the two screws that hold the element in place. I then pulled the element out about 3 inches and disconnected the two wires, then removed element and replaced with new
.
Read more...
Your Price
$6.96
   In Stock
Litton Drip Bowl - 6 Inch
★★★★★
★★★★★
88 Reviews
PartSelect Number PS11750108
Manufacturer Part Number WPW10196406
This drip bowl is used for electric cooktops and ranges, it is designed to sit under a 6-inch surface burner. It catches the drips and spills coming from the cookware on the surface burner. This drip bowl is chrome, and it has a diameter of 8 inches. You need to remove the burner element to replace this part. Line the hole up with the element terminal blocks, and ensure the new bowl is flush with the surface of the cooktop before replacing the burner element. Drip bowls need to be replaced when they are lost, damaged, or you are no longer able to clean them adequately. This replacement part is sold individually.
Fixes these symptoms
Installation Instructions
Joe from Greeley, CO
oven wouldn't heat
First I removed the two screws that hold the element in place. I then pulled the element out about 3 inches and disconnected the two wires, then removed element and replaced with new
.
Read more...
Your Price
$38.48
   In Stock
Litton Refrigerator Door Switch
★★★★★
★★★★★
83 Reviews
PartSelect Number PS12728638
Manufacturer Part Number W11384469
Door switch turns the light off when you close the door.
Fixes these symptoms
Installation Instructions
Clint from Rayville, MO
Lights inside refrigerator not working
I used a flat-head screwdriver to pop out the old light rocker switch. Then, I unplugged the wires, plugged them into the new light rocker switch, and then popped the new switch into the hole. That's it! Lights began working again. Read more...
Your Price
$10.10
   In Stock
Litton Drip Bowl - 6 Inch
★★★★★
★★★★★
33 Reviews
PartSelect Number PS2366565
Manufacturer Part Number W10196406RW
If your element will not heat, there could be an issue with your drip bowl. This chrome drip bowl is 8 inches in diameter, and fits most electric ranges. Before you replace the drip bowl, make sure the element is turned off and cool to the touch. Installation is easy, just remove the element, replace the current drip bowl, and replace the element. Make sure the small hole on the bowl lines up with the element socket. The manufacturer has substituted this part, it now has a hole in the center, and no longer has a solid bottom. For a step by step guide, click the video below.
Fixes these symptoms
Installation Instructions
Michael from Kings Park, NY
Drip bowls were rusty and rotting through
I simply removed the elements and replaced the drip bowls with new ones. Put the elements back in and my stove looks %1000 better! Read more...
Your Price
$34.75
   In Stock
Litton Long Oven Sensor
★★★★★
★★★★★
33 Reviews
PartSelect Number PS1570174
Manufacturer Part Number 12001656
This long oven sensor is also commonly known as a temperature sensor. It is designed for use with ovens and ranges. It is similar to a thermostat; it measures and regulates the internal temperature of your oven cavity. There is an adapter at one end, a probe at the other, and they are connected by an insulated wire. The probe is approximately 7 inches long. You can test the sensor with a multi-meter for functionality. You need to check the model-specific manual to determine what the proper resistance is for your specific appliance. This oven sensor comes with two wire harness adapters and a set of instructions.
Fixes these symptoms
  • Door won’t open after self cleaning cycle
  • Element will not heat
  • Little to no heat when baking
  • See more...
Installation Instructions
David from Westford, MA
Oven not holding 350 F, when cooling the coils did not reheat
Removed the oven door by opening slightly, then pic door up to remove. Remove 2 screws holding oven sensor in place, gently pull on sensor to remove, had to remove about 8 inches to get at plastic connector. Unplug connector, had to use an adapter cable supplied with the PartSelect kit to install new sensor, push cable back into opening, reinstall 2 screws. The oven works fine! Note that due to thermal lag the temperature overshoots to 370 degrees and undershoots to 340 degrees, this appears to be normal oven operation. Putting door back in place was easy. Read more...
Your Price
$139.15
   In Stock
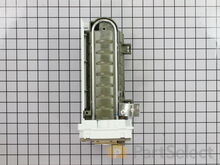
Litton Replacement Ice Maker
★★★★★
★★★★★
150 Reviews
PartSelect Number PS2121513
Manufacturer Part Number D7824706Q
This ice maker (Ice Maker Assembly, Refrigerator Ice Maker) produces ice cubes that are ejected into the storage bucket. It is located in the freezer section of your appliance, mounted on the freezer wall. The ice maker can break from normal wear and accidental damage. If this happens, your refrigerator may no longer make ice cubes, or may not make enough cubes, and the part should be replaced. This model measures approximately 11 inches long and 5 inches wide. It’s constructed of plastic and metal, and comes in black/white/silver. This assembly includes the ice mold and the control device.
Fixes these symptoms
  • Clicking sound
  • Doesn’t stop running
  • Ice maker dispenses too little ice
  • See more...
Installation Instructions
Bernie from Diamond Bar, CA
Icemaker producing few or no cubes and often leaving "kling-ons" on ice tray
Interior surface of ice tray felt rough & flaky (coating deteriorated) so cubes would not release.
Unplug appliance.
Remove timer cover by hand pressure @ edge.
Remove single attachment screw & bracket at lower front of icemaker.
Disconnect wiring harness from socket @ rear of compartment.
Tricky part was determining what type of connection held the other two attachment points along the long edge of the icemaker. I did not have repair manual or useful drawing but looked @ PartsDirect pic of side brackets & used a small mirror to confirm that mine were also some sort of "snap in" attachment.
Remove icemaker unit by pushing upward and outward on the unit. I takes a good bit of pressure and will pop loose, but be careful not to break attachment bracket from freezer wall.
Scavenge shut off bar and wiring harness from old icemaker once you have it out & attach to new one before installing it back in freezer.
Again, you might find a mirror useful to align those pesky snap-in brackets with the new unit.
Since you probably kept your freezer running while waiting for the part, the plastic snap-ins will be cold and brittle. I warmed them up first by applying a dampened cloth heated in the microwave to make them a little more pliable.
A good push of the new unit towards the snap-ins along with some upward force will get it stable.
Reattach the metal screw in bracket & connect the wiring harness to rear plug... and don't forget to plug the whole thing back in.
It will take awhile for the first batch of cubes dump as the timer may need to cycle completely around to get to the fill cycle... be patient.
Dump the first couple of batches of cubes just to make sure you're free of any residue.
Read more...
Your Price
$79.16
   In Stock
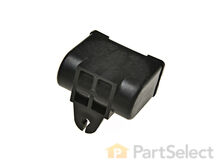
Litton Capacitor
★★★★★
★★★★★
39 Reviews
PartSelect Number PS11757023
Manufacturer Part Number WPW10662129
This capacitor (Refrigerator and Freezer Compressor Run Capacitor, Run Capacitor) provides the voltage or energy current required to start the compressor and keep it running. It allows the compressor in your appliance to easily cycle on and off. This capacitor mounts directly onto the compressor starting relay. If the capacitor is faulty the compressor may get unusually hot and draw excessive amperage. It the compressor overheats, it may fail to run until it cools down again. The compressor may also get noisy from overheating. If this part is totally electrically open, it is defective (often due to overheating) and needs to be replaced. The part measures 1 inch by 1-1/2 inches, and is constructed of plastic with two metal wire terminals. This item includes 1 capacitor, sold individually. This part comes in black.
Fixes these symptoms
  • Clicking sound
  • Freezer not defrosting
  • Freezer section too warm
  • See more...
Installation Instructions
garth from forest lake, MN
My refrigerator stopped cooling and the freezer section stopped freezing
I knew the chances of all the freon leaking out was unlikely so I looked at the wiring to the compressor and there was a capacitor and a starter/overload so i figured I would start there. I went on line and found the parts at this site and they were less than the minimum service call charge for a service tech so I figured what the heck let's give her a shot so I did give it a shot. I ordered the parts and they were there in less time than a service tech could come out and i installed the parts and guess what for 90.00 in parts and 15 minutes in time I repaired my refrigerator. Thanks guys, It took less time to order the parts than it did to make the repair so thanks, your website rocks and is very well designed so my hat is off to you guys! Read more...
Your Price
$13.91
   In Stock
Litton Surface Burner Receptacle Kit
★★★★★
★★★★★
19 Reviews
PartSelect Number PS1570190
Manufacturer Part Number 12001676
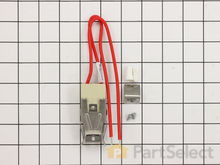
The tools you will need to replace the surface burner receptacle kit on your range include a Phillips screw driver, and a pair of wire strippers. Before doing this repair, make sure to disconnect your appliance from the power supply and wear work gloves to protect your hands. The surface burner receptacle kit comes with a plastic block, high temperature wire nuts, a metal bracket, and wires. This part functions as the connection between the wire harness and the surface element in your range.
Fixes these symptoms
Installation Instructions
Richard from Carthage, NC
Stove top element not working due to bad receptacle.
Turned off the power at the breaker box, cut the wires approximately 5 inches from the bad receptacle and removed it after removing one screw. Stripped back the wires about 1/2 inch and attached the new wires with the ceramic wire nuts provided and secured the receptacle back in place with the new screw provided in the kit.
My sister's husband wanted to scrap the whole range but I repaired it with $14.00 worth of parts.
The element is working great now.
Whenever I need appliance parts again I'll use partselect.com.
Read more...
Your Price
$57.79
   In Stock
Litton Flat Style Oven Igniter Kit
★★★★★
★★★★★
55 Reviews
PartSelect Number PS1573892
Manufacturer Part Number 12400035
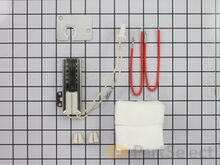
The flat style oven igniter kit is used in gas ovens and ranges. It is what provides the heat needed to open the gas valve, and it ignites fuel for the burner assembly. This part can be used for both bake and broil elements, and it can replace both short and long igniters. However, it cannot replace round style oven igniters. If your igniter glows for 90 seconds or more without igniting the burner, this means it is too weak to open the valve. The element in your igniter may have shorted it and it might not glow at all, or it might only glow orange or red. It needs to glow white hot; if it cannot get hot enough the gas will not be released from the safety valve and it will be impossible to light the burner in your oven. This kit includes the igniter, ceramic wire nuts, an insulation pad, a metal bracket, a variety of plug ends, and an instruction sheet. The body length is 3 3/4 inches, and the element inside is approximately 1 1/2 inches. This replacement part has an amperage range of 3.3 to 3.6. The element inside this igniter is extremely fragile, do not touch it. Before you start repairing your oven or range, make sure you have unplugged it and shut off the gas supply.
Fixes these symptoms
  • Element will not heat
  • Gas igniter glows, but will not light
  • Gas smell
  • See more...
Installation Instructions
James from Ferndale, MI
Oven would not work but the Broiler did
The oven had been working intermittently for a while and after repeated threats of starvation from my spouse I finally took a look even though it was summer and the grill was working fine. The Igniter would glow red when the oven was turned on but the gas would not flow to it no matter what the temperature setting. I searched online and found this site that explained it was possible for the igniter to glow but if it was not drawing the correct amperage (because its resistance was too high) then the main brain would not allow the gas valve to open. So I took a look at the broiler and it had the same igniter. I measure the resistance of both of them and the oven igniters resistance was higher (don't rememeber the reading) then I moved the Igniter from the broiler to the oven and the oven worked from there it was just a matter of ordering the part. End of story except for I am still doing all the cooking on the barbecue outside. Read more...

Litton Appliance Types

Popular Litton Models

Below are the most popular Litton models we have. Enter your model number in the search box to find your model.